Below you can find a variety of the Roundcube Webmail system settings, which allow you to customise and make work with your University mailbox easier. Customise your webmail inbox according to your preferences.
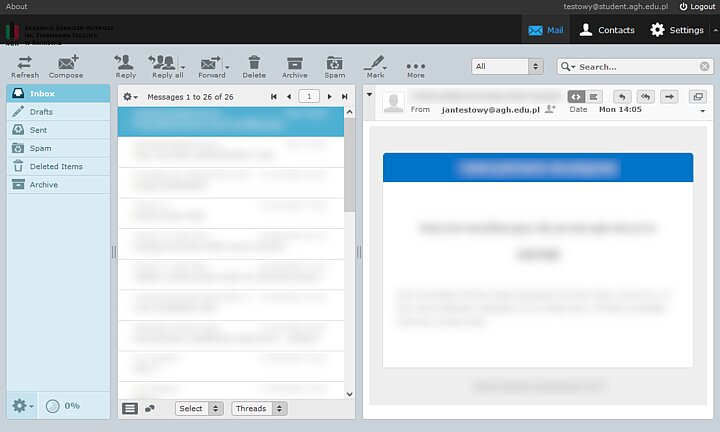
All of the options shown below are available in the "Settings" or "Contacts" tabs located in the upper right corner.
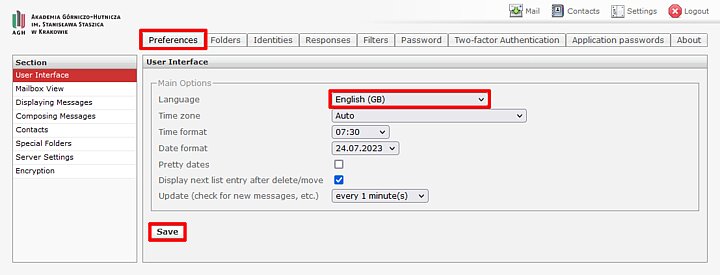
- To change the language, select "Preferences" from the upper menu, then choose "User interface" from the menu to the left. Choose a language from the list and press "Save".
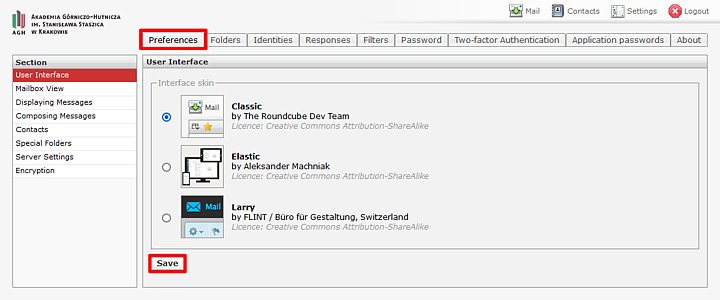
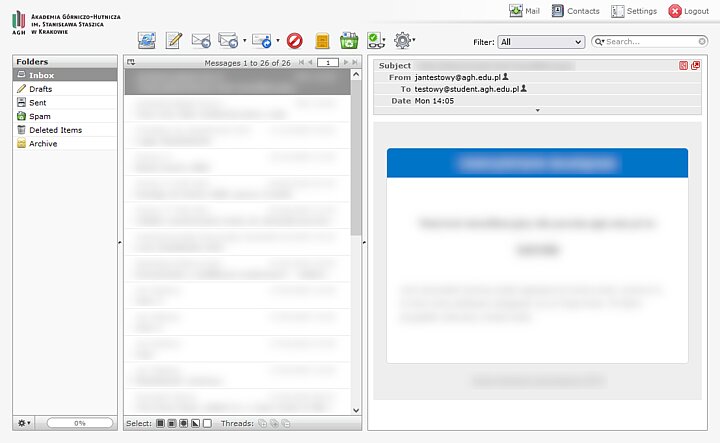
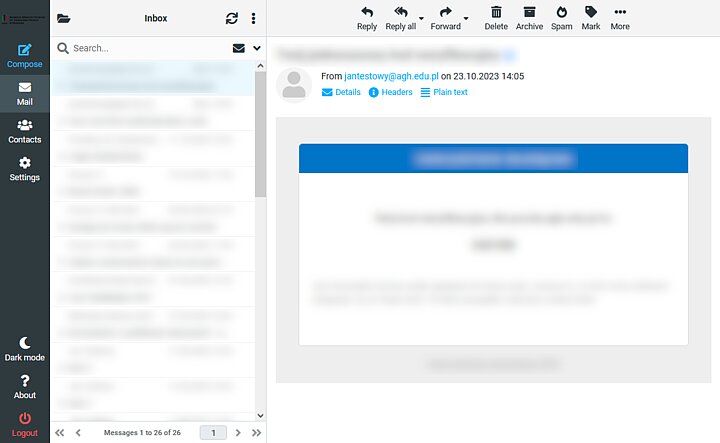
- To change the theme, select "Preferences" from the upper menu. Then select "User interface", choose a theme you would like to apply and press "Save".
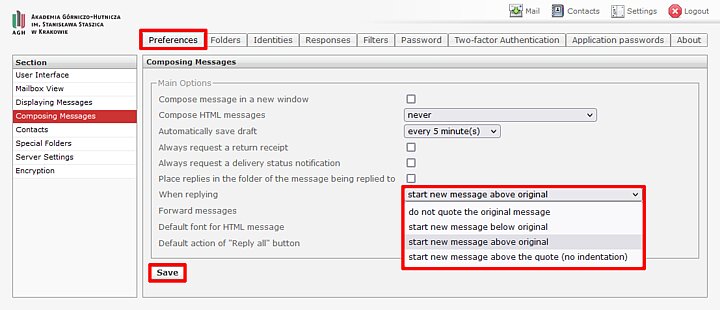
- By default, your message will be shown below the quoted message. To change that, choose "Preferences" from the upper menu, then select "Composing Messages". From the drop-down menu next to the "When replying" option choose the preferred setting and press "Save".
There are four options available:
- do not quote original message.
- start new message below original,
- start new message above original,
- start new message above the quote (no indentation).
Folders in mailboxes can be used to organise messages and to create filters to automatically sort incoming messages into specified folders.
Keep in mind, that folders must be created only via a web browser (poczta.agh.edu.pl) as folders created within an e-mail app (such as Thunderbird, etc.) may not be properly synced with the mailbox.
-
To add a new folder, choose the "Folders" tab and click the "+" button located in the lower left corner.
-
Enter the folder name, choose a parent folder from the drop-down menu and press "Save".
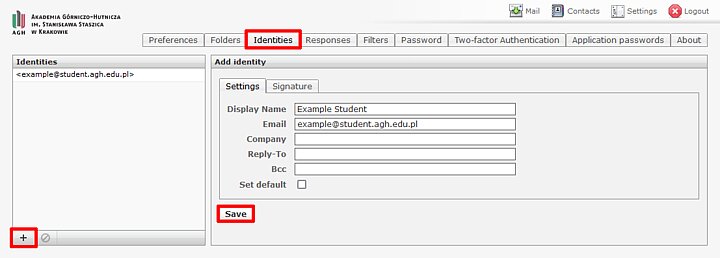
Identities are used to expand information that is included in your messages. You can enter your name, which will be displayed in front of your e-mail address in outgoing messages, specify the e-mail address the messages will be sent from (main address or alias), organisation (unit) you're a part of, reply address or a hidden copy.
-
To customise your default identity, choose "Identities" from the upper menu, then select the identity from the list on the left side of the screen. This identity is assigned to your main e-mail address. Fill in the fields according to your preferences and click "Save".
-
If you would like to add an identity assigned to your alias, click the "+" button located in the bottom left corner. In the e-mail field enter your alias and fill in the other fields according to your preferences. Click "Save". Your new identity will be visible on the list of identities on the left side of the screen.
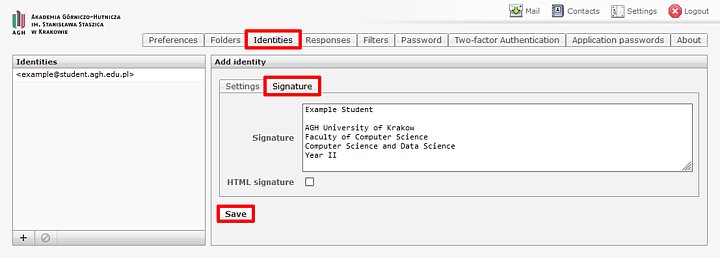
- In the "Signature" tab you can add information that will be attached to the bottom of each of your message.
Identities customised via Webmail can be used only while sending messages through the browser; they must be configured separately within a mailing app (e.g., Thunderbird, Outlook) if you are using one.
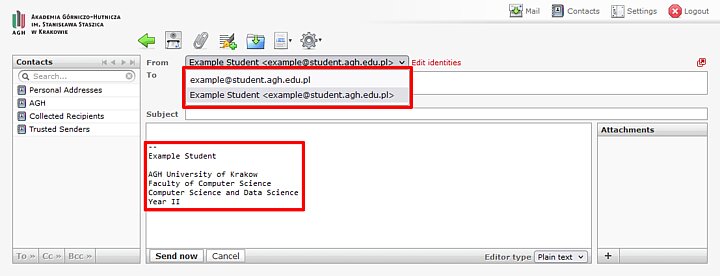
- If you would like to change the identity for a specific message, start a new message and expand the "From" field. All of your previously configured identities should be listed out. Choose the one you would like to send this message from. Below you can also see a customised signature.
Aliases
An alias is an e-mail address. You cannot use it to log into any of the University's systems – you must always use your main e-mail address as login. Depending on which user group you belong to, your alias may have a different form: name.surname@agh.edu.pl or student_ID_number@student.agh.edu.pl (you can find a detailed list of e-mail accounts and aliases available to each user group here: Account validity extension).
It is not necessary to configure your alias for incoming mail – if someone sends a message to your alias, the message will automatically appear in your main inbox; however, if you would like to send a message from your alias, you need to add a new identity to your account. Adding an identity is explained in the user guide above.
Response templates can be used to make your work easier when you repetitively need to send messages which are similar or identical.
-
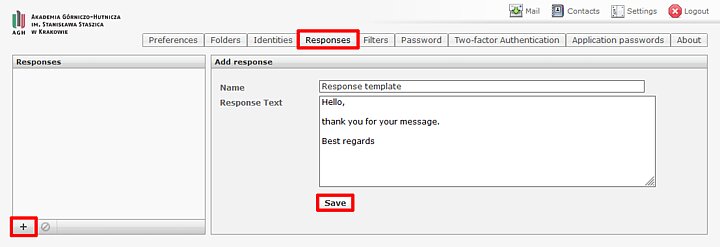
Select "Responses" from the upper menu, then click the "+" button located in the bottom left corner.
-
In the "Add response" section, enter a response name – to make it easier for you to find the response you need, use a name relating to the message, e.g., "Thank you for your message" or "Awaiting supervisor's decision", "Additional info needed", etc. In the response text, add the body of your message and click "Save".
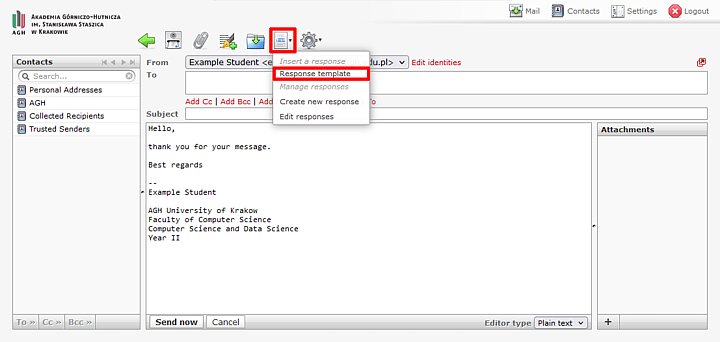
- You can use the response templates while composing a new message or replying to one. From the action buttons, choose "Insert a response" and select the response you would like to usefrom the drop-down menu. Here you can also find the option to add a new response.
The autoresponder filter is used to send automated messages in response to messages you receive during the time of your absence.
-
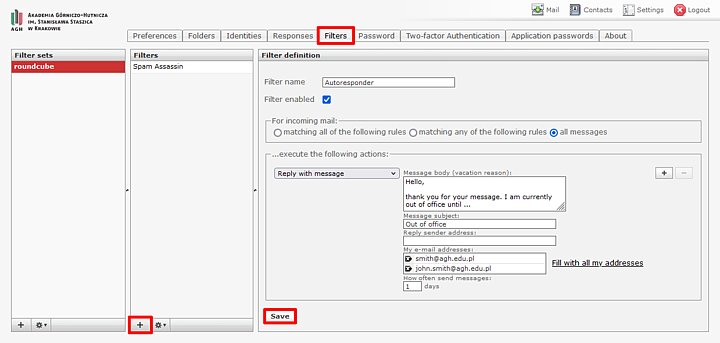
Choose "Filters" from the upper menu, then press the "+" button located on the bottom of the "Filters" pane.
-
In the "Filter name" field enter "Autoresponder". If you want the filter to be active immediately, tick the "Filter enabled" box.
Set the parameters as shown below:
| "For incoming mail" | select "all messages" |
| "Reply with message" | enter the text of the message that will be sent in response to all the messages you receive while the filter is active |
| "My e-mail addresses" | enter your e-mail addresses (main one and/or alias); if you would like to enter more than one address, press "Enter" on the keyboard after entering the first address |
| ”How often send messages” | we recommend setting this option to "1" |
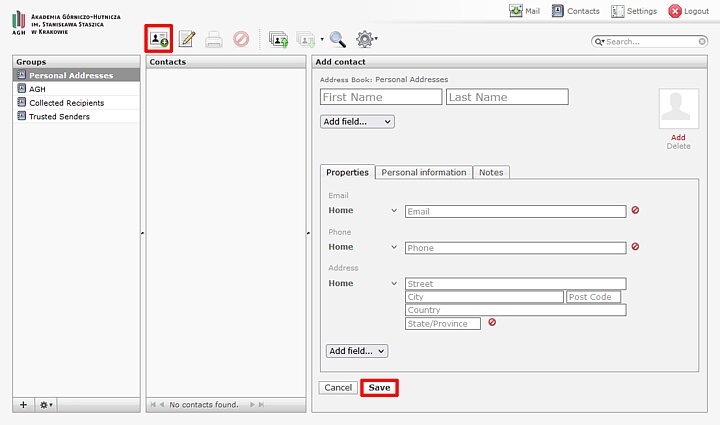
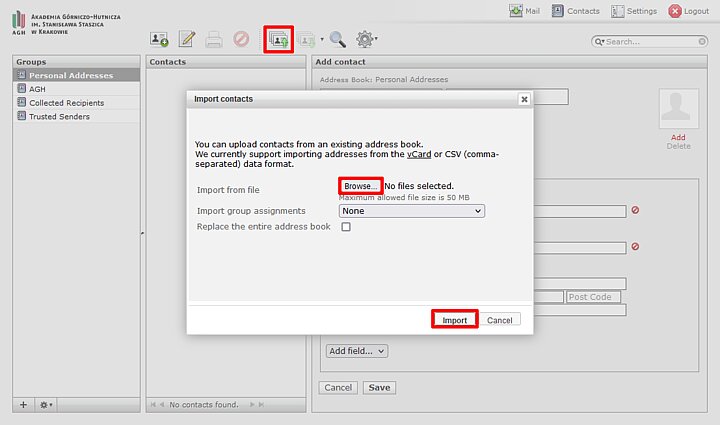
Adding contacts, either by entering them one by one or importing them from a file, will create your address book. By doing so, while composing a message and entering the addressee, your address book will automatically suggest matching contacts after typing only a few characters. To add a contact, select the "Contacts" button located on the top right corner of the screen.
- Choose "Add new contact" from the upper menu. In the "Add contact" pane, fill in the contact info of the person you would like to add to your address book. Once you are done, click "Save".
